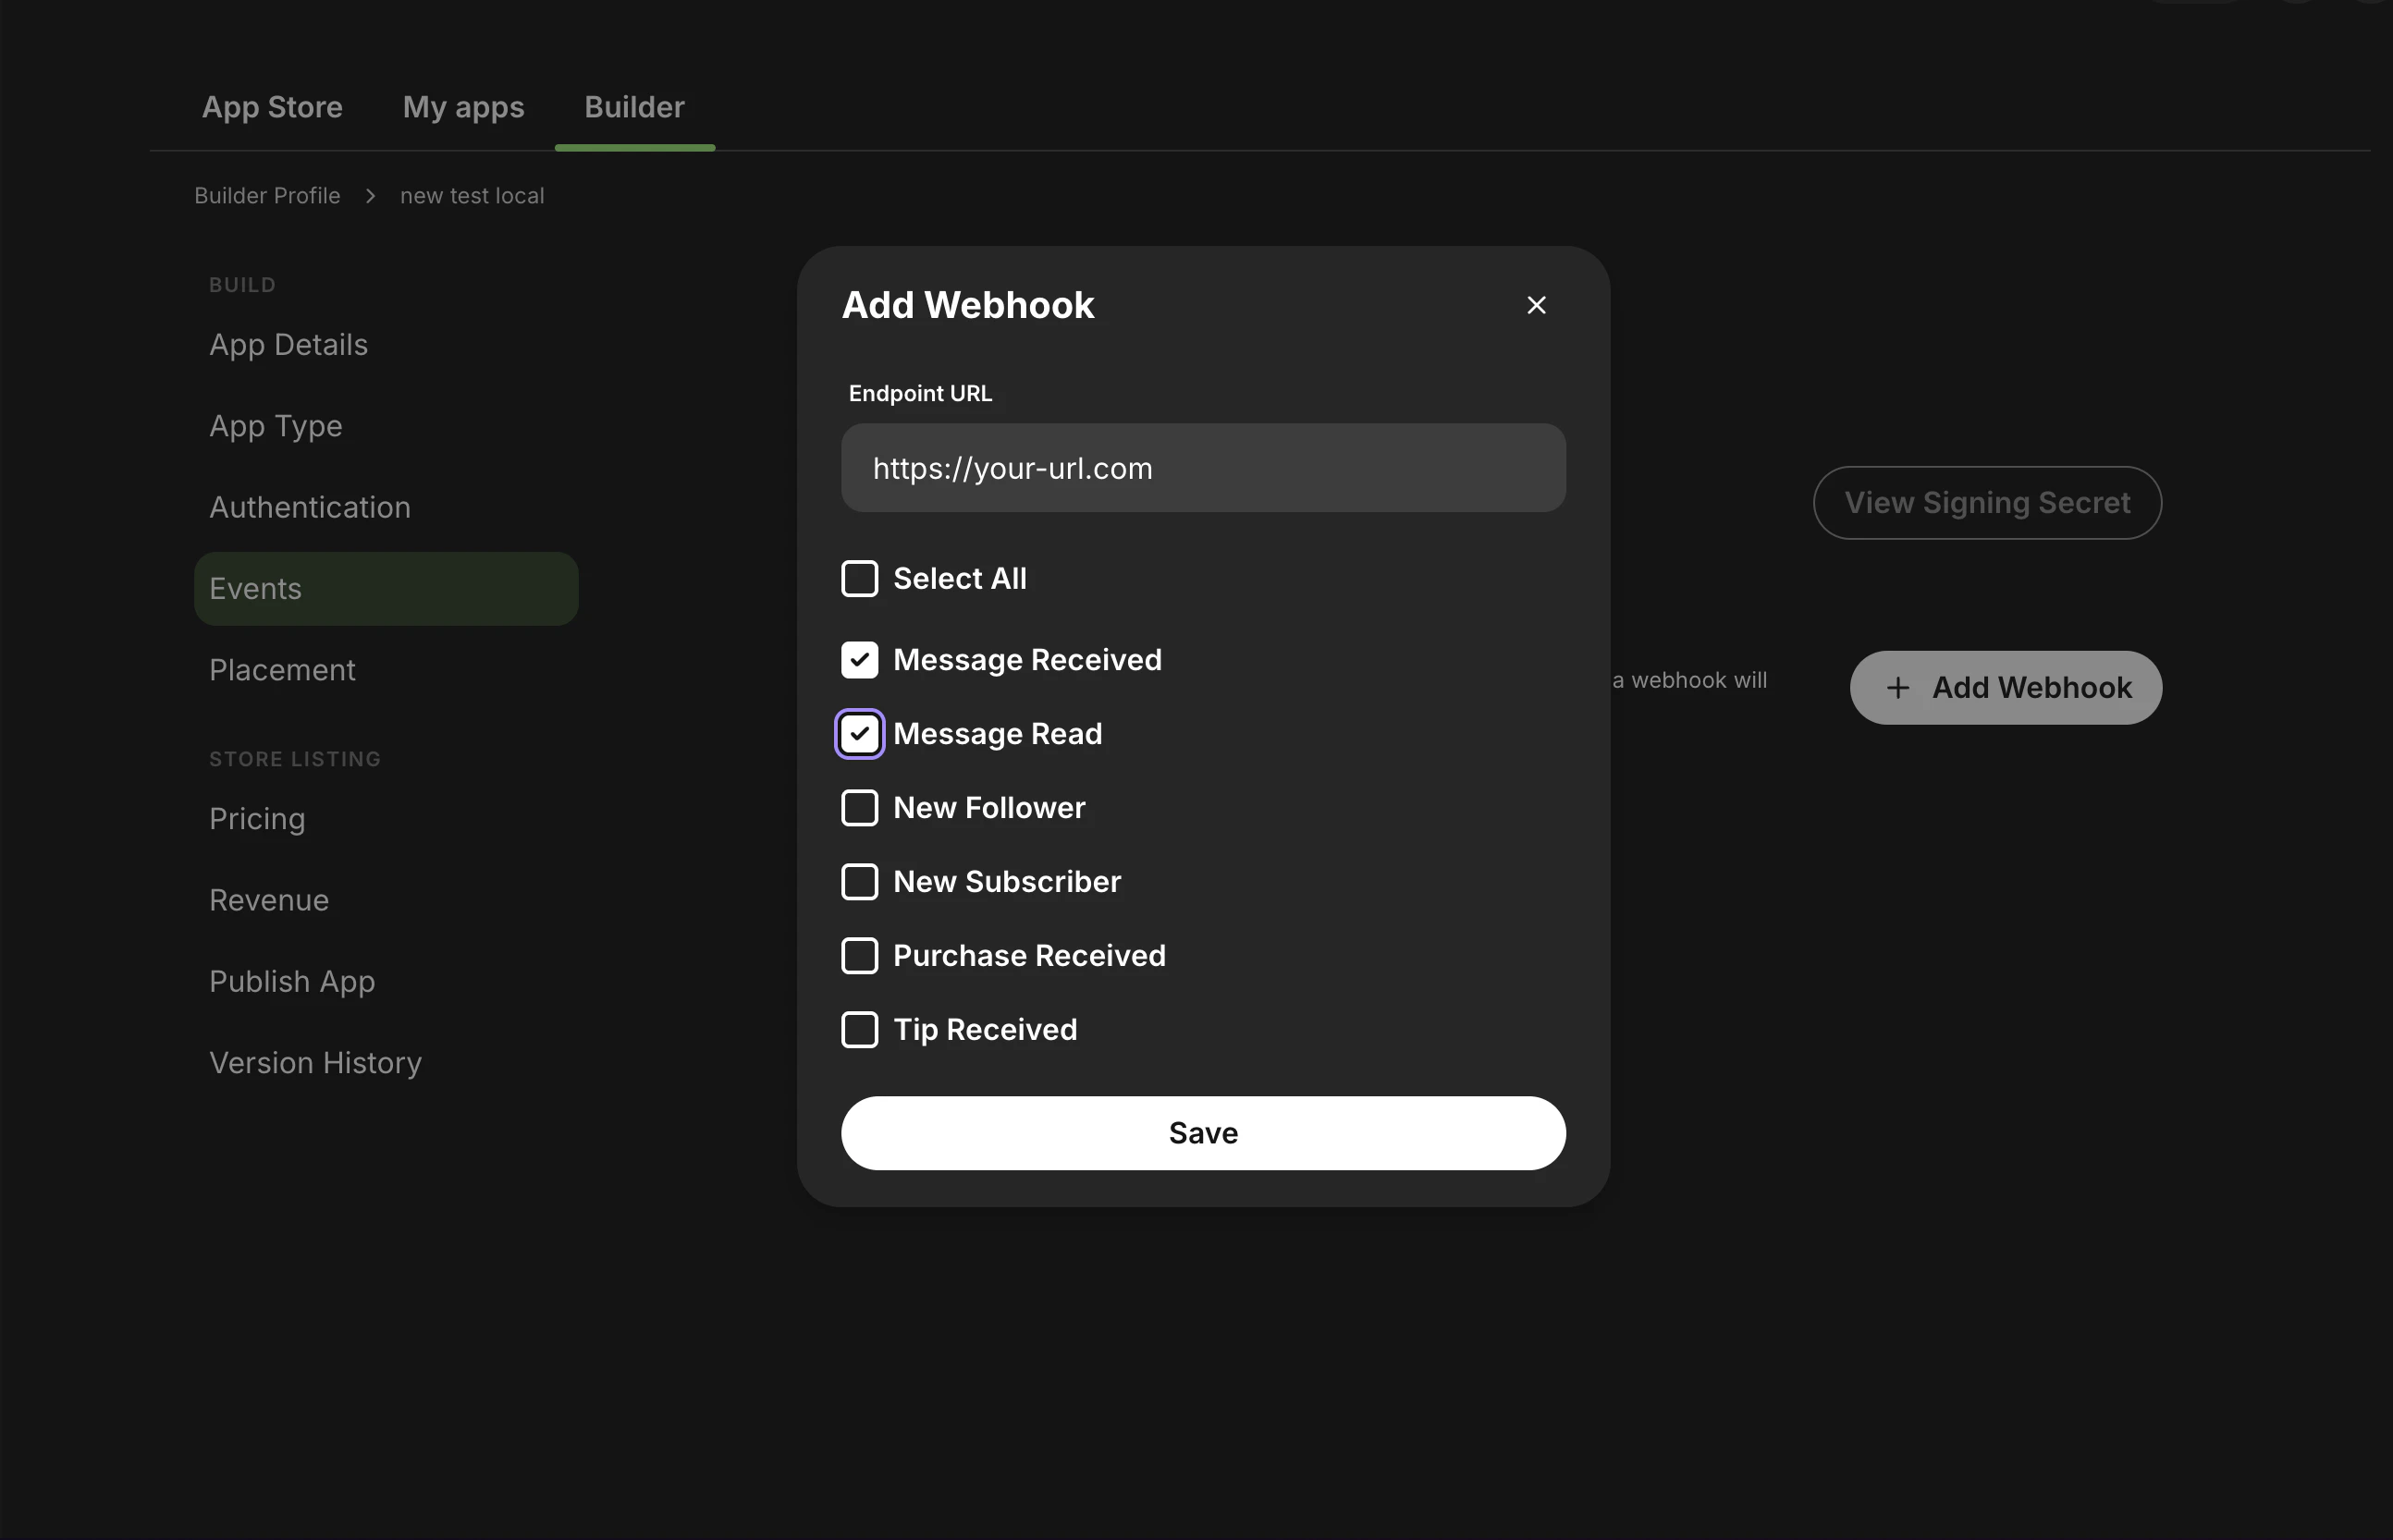
- Message Received
- Message Read
- New Follower
- New Subscriber
- Purchase Received
- Tip Received
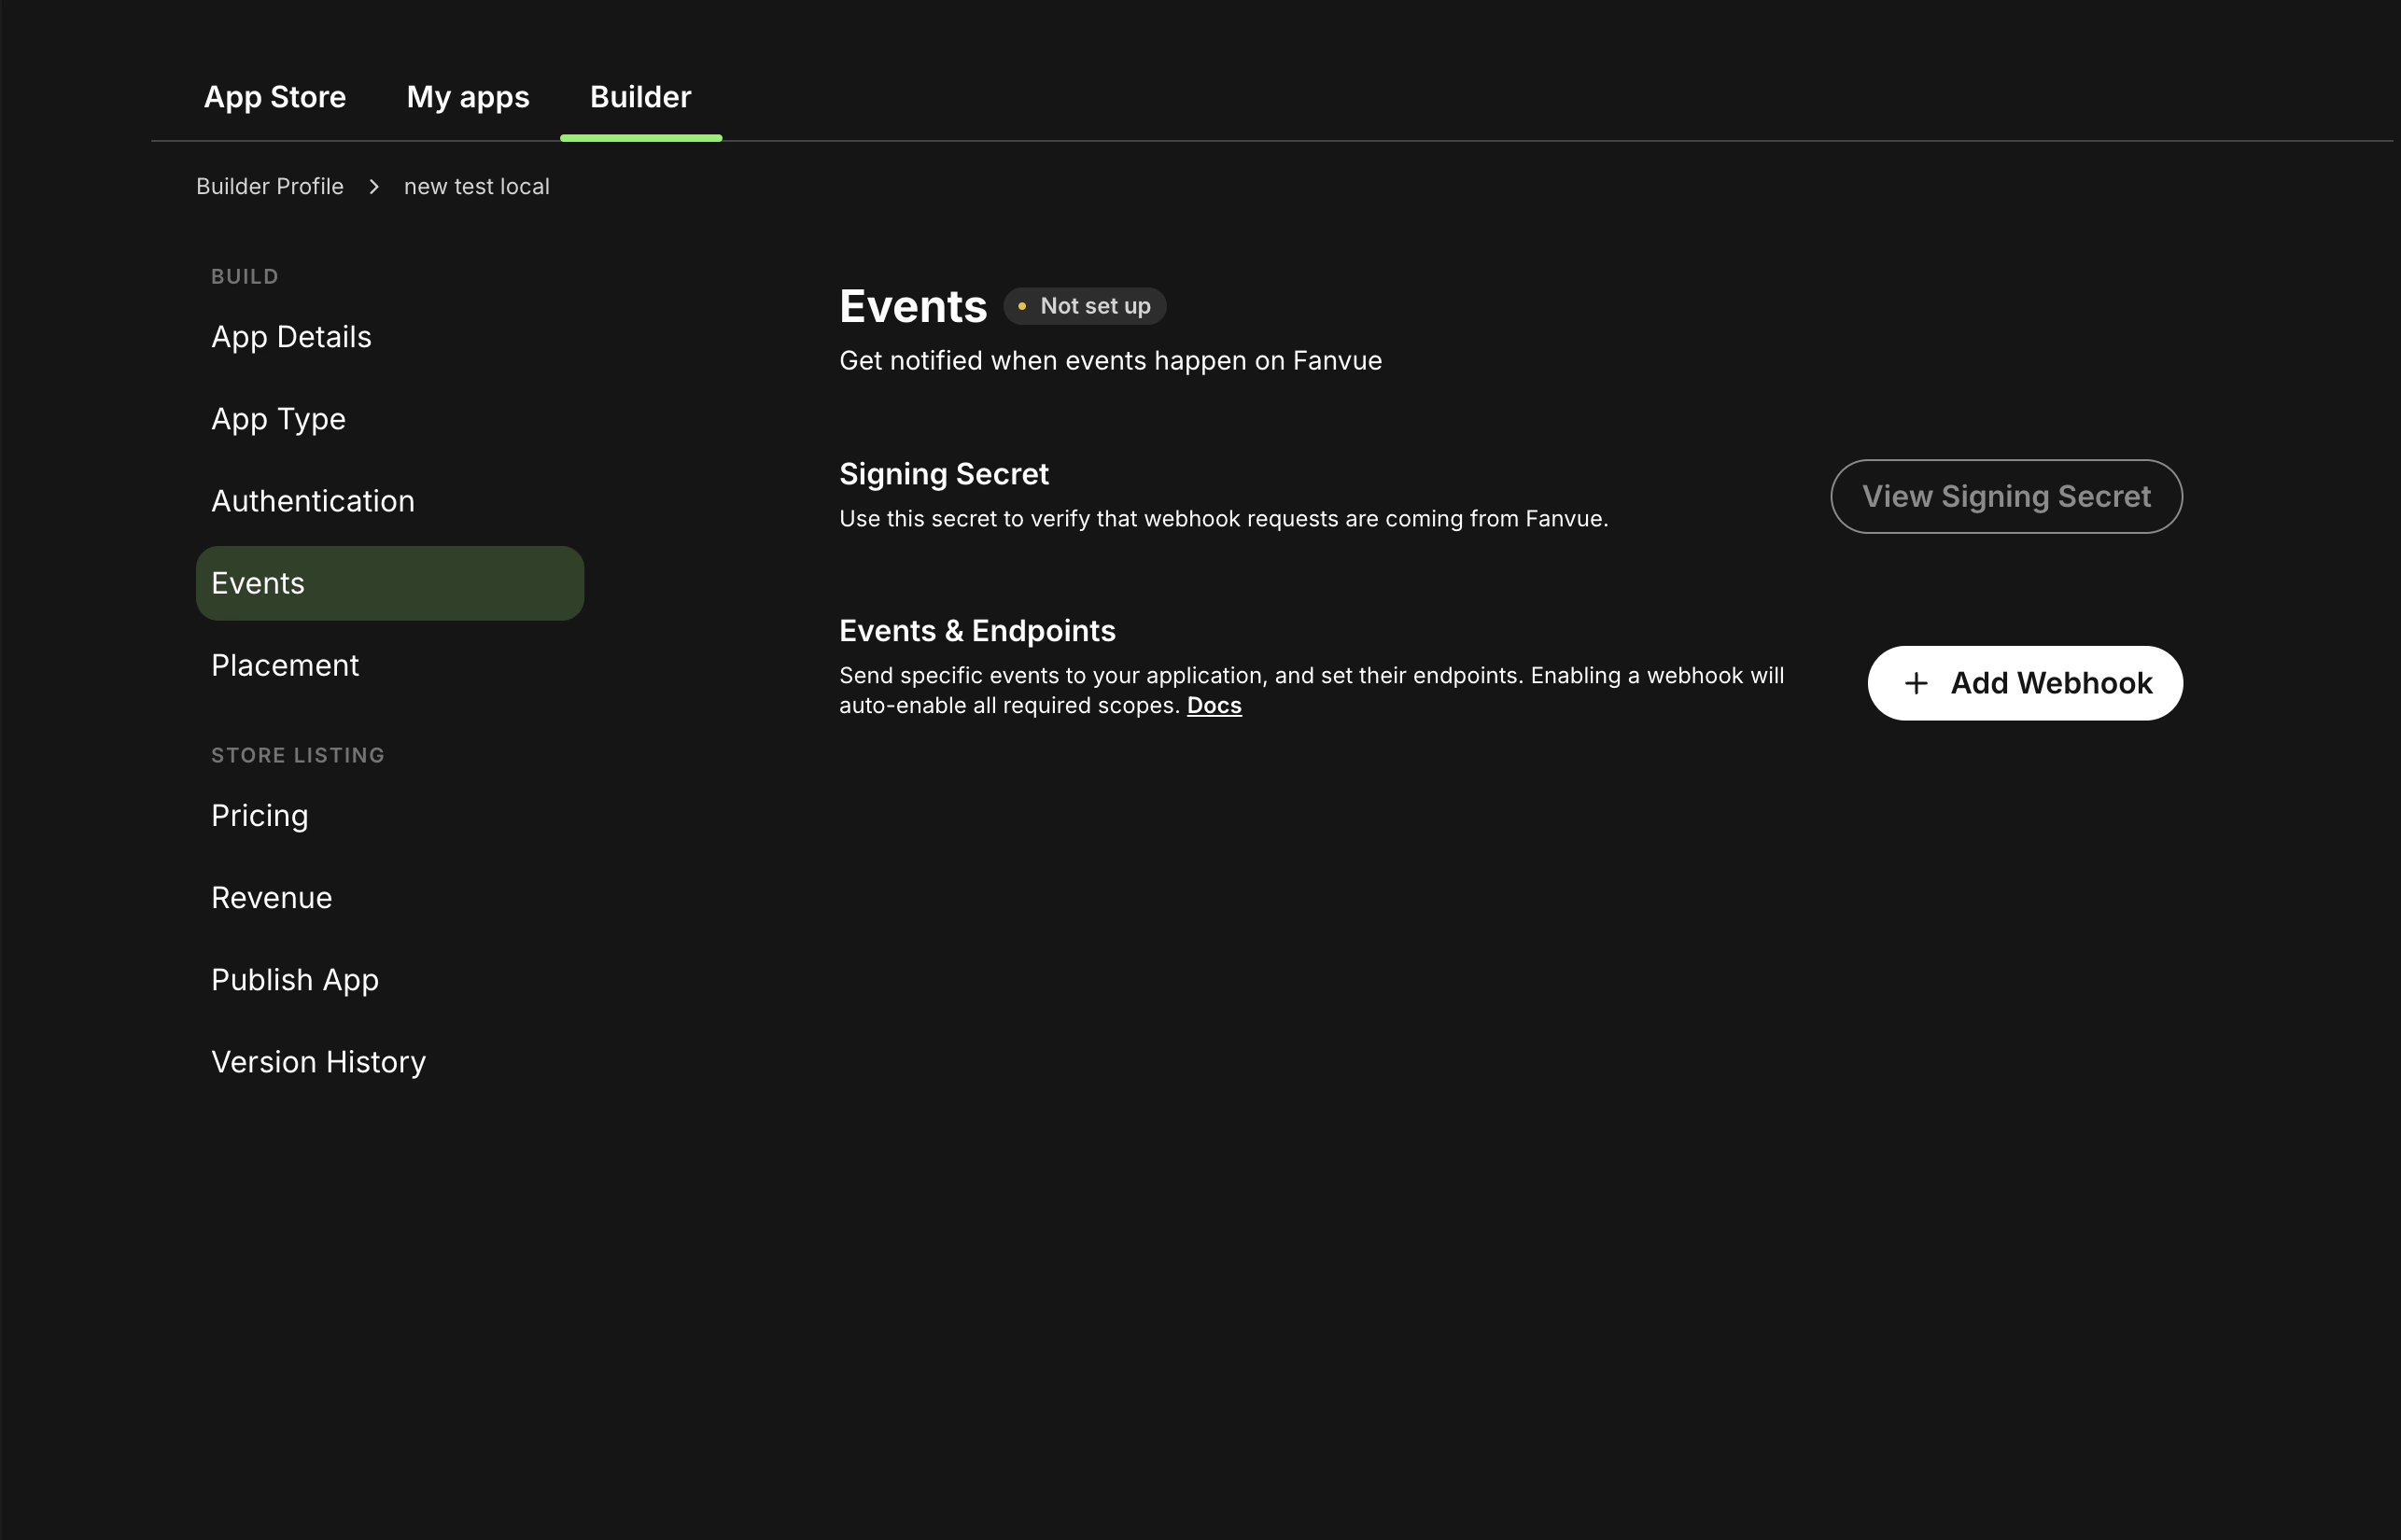
Setting up a webhook
- Set up an endpoint on your backend to receive webhooks. It should accept POST requests from our API and return a 2xx response.
- Navigate to the Fanvue Developer Area, select your app and open the Events tab.
- Click Add Webhook. In the dialog, enter your Endpoint URL and select the events you want this endpoint to receive. Use Select All to subscribe to every event, or tick individual events. A single endpoint can listen for multiple events.
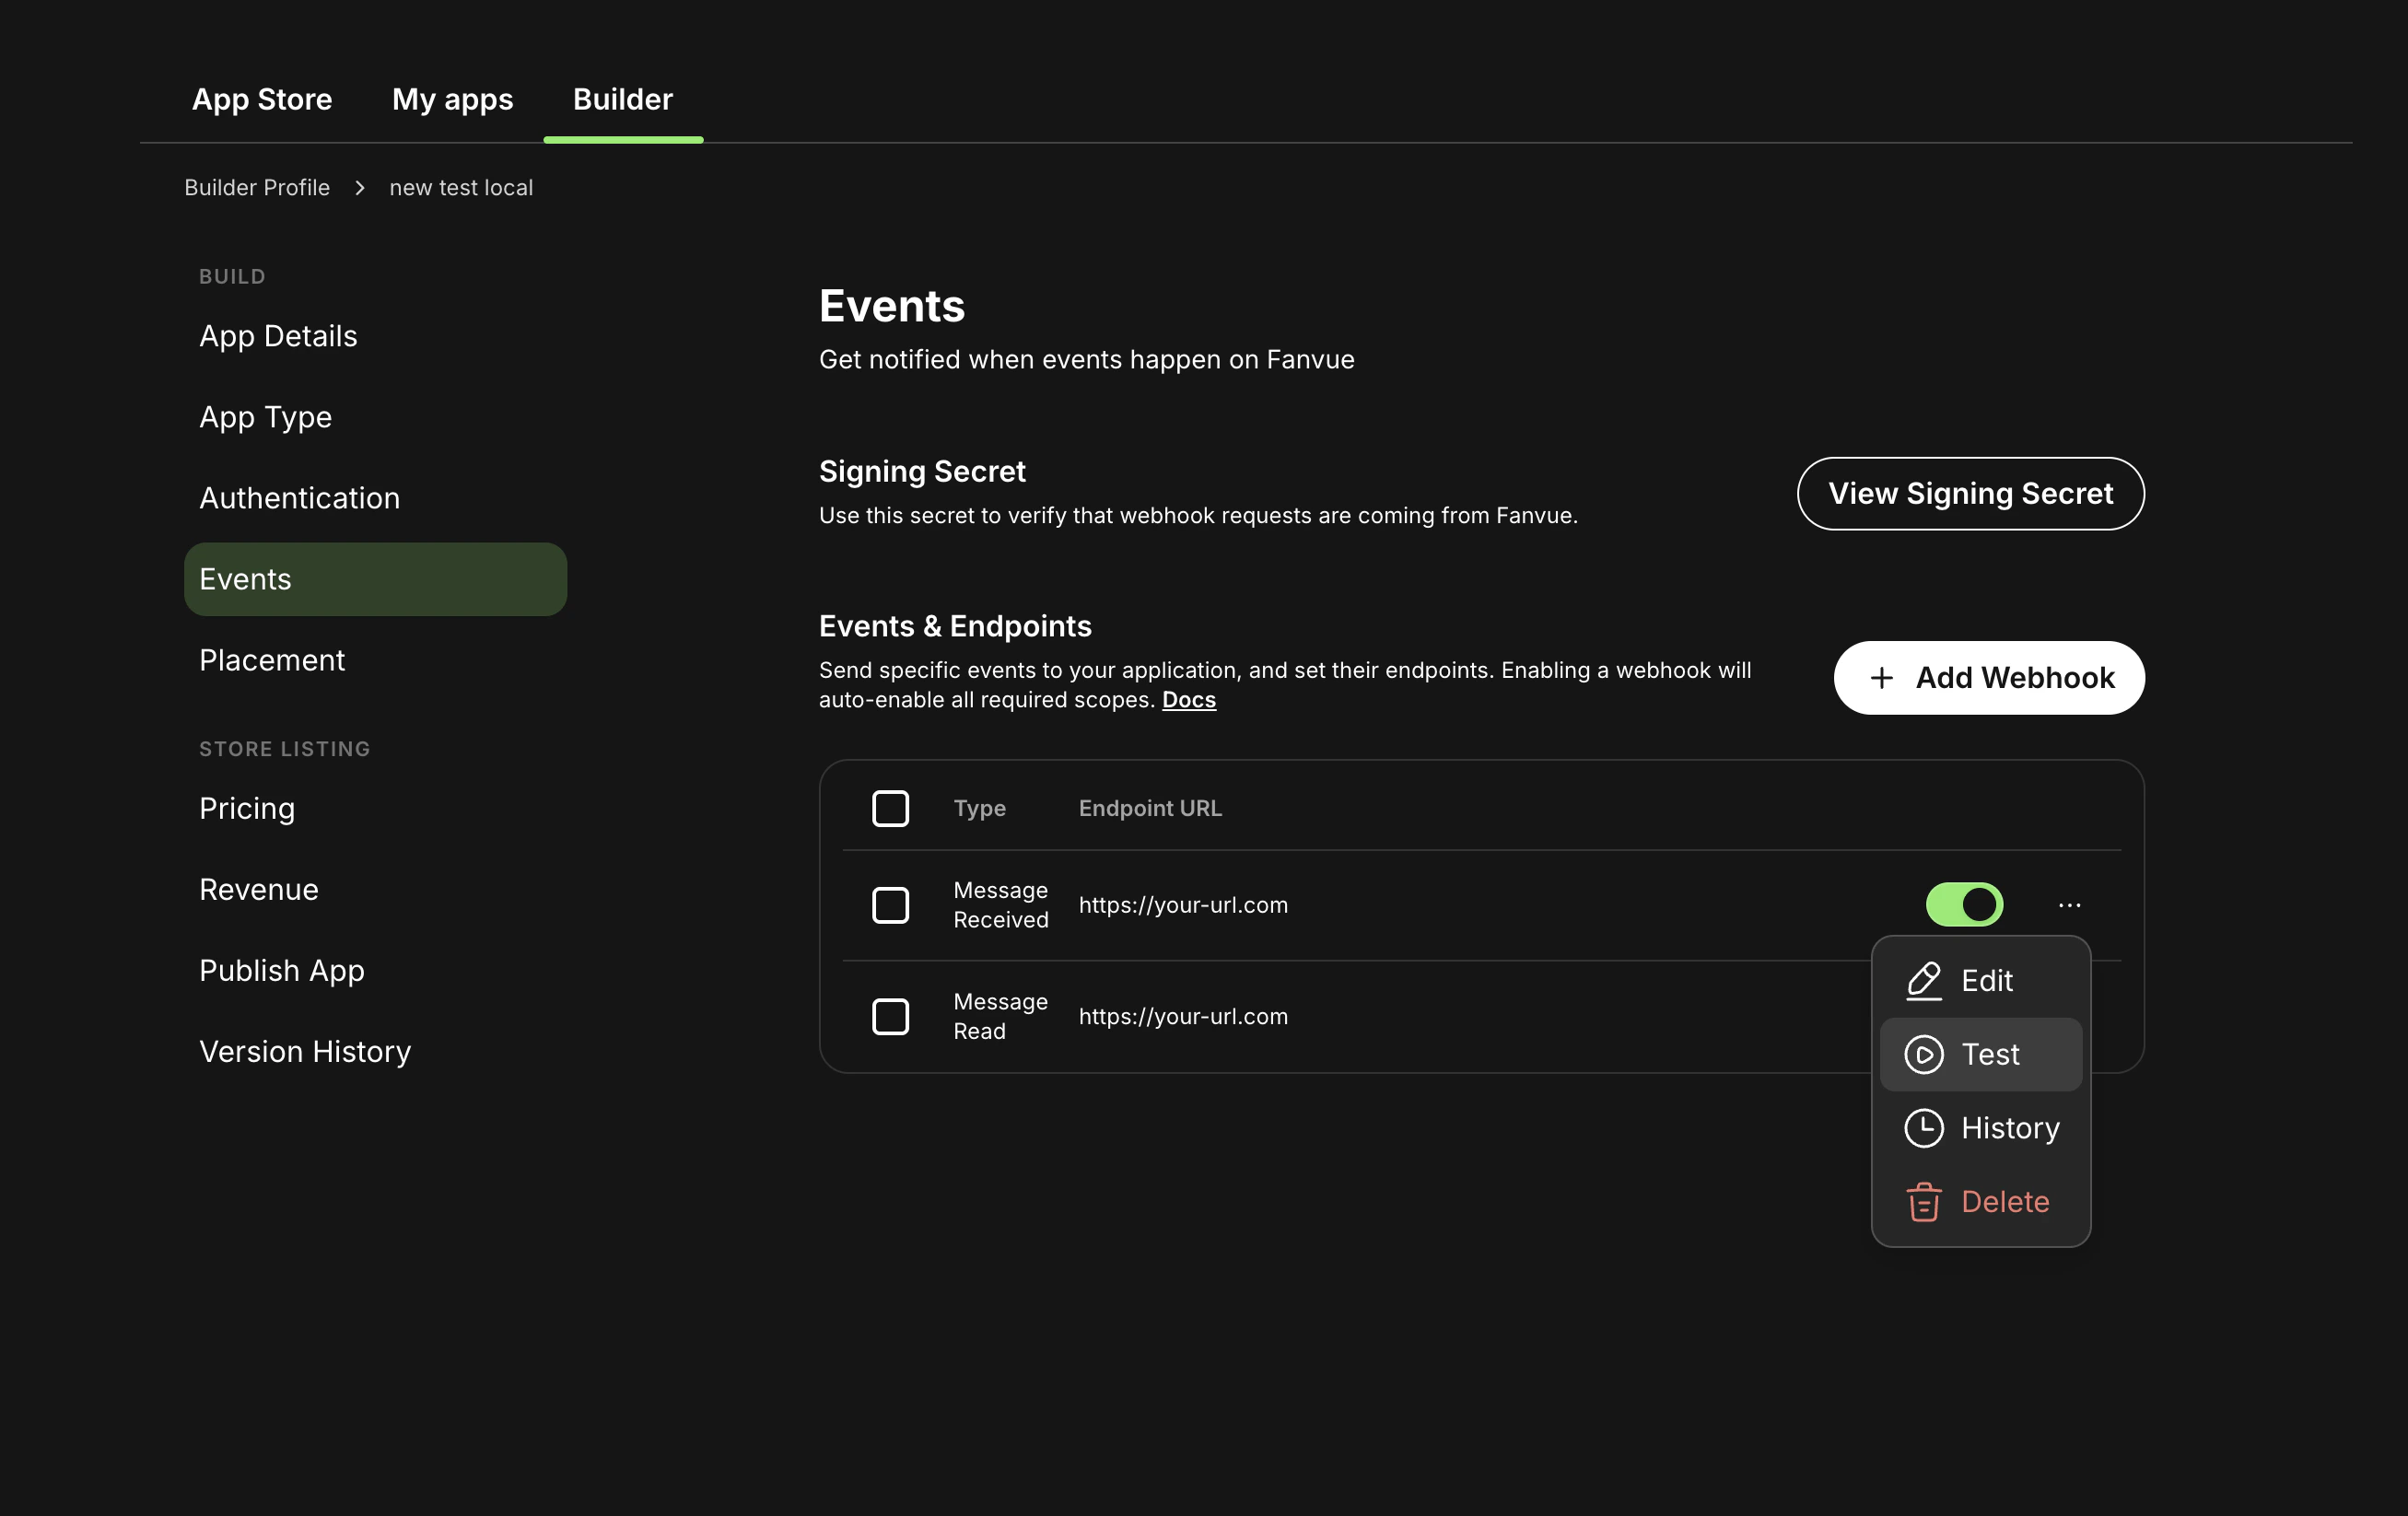
- Click Save. The webhook is created and appears in the Events & Endpoints list, where you can enable or disable it with the toggle.
Each webhook event requires certain OAuth scopes to work. Enable the required
scopes in the Authentication tab. See Required scopes per event for the full mapping.
Missing scope warnings
Different webhook events require different OAuth scopes. For an event to be delivered, your app must have the scopes that event needs enabled in the Authentication tab, under Define permissions. If a webhook needs scopes that your app does not yet have, the Events tab shows a warning that the required consents are missing. Enable the relevant scopes in the Authentication tab to clear it.
Managing and testing webhooks
Each webhook in the Events & Endpoints list has an actions (…) menu:- Edit, change the endpoint URL or the events it subscribes to.
- Test, send a sample payload to your endpoint so you can confirm it is reachable and that your signature verification works, without waiting for a real user action.
- History, review recent delivery attempts for the webhook.
- Delete, remove the webhook.
How deliveries work
- Each webhook is delivered as an HTTP POST with
Content-Type: application/json. - The request body contains an event-specific JSON payload.
- Your endpoint should return a 2xx response as soon as you successfully receive and persist the event.
Verifying webhook signatures
Every webhook request includes anX-Fanvue-Signature header (format t=<timestamp>,v0=<signature>). Verify it on every request so forged or replayed events are rejected before you act on them.
See Verify Webhook Signatures for the header breakdown, where to find your signing secret, the step-by-step verification flow, and complete Node and Python samples.
Testing locally
- Expose your local server with a tunneling tool (for example,
ngrok) and copy the public HTTPS URL. - Add a webhook in the Events tab with that URL and the events you want to receive.
- Use the Test action in the webhook’s … menu to send a sample payload to your endpoint, or trigger the event in a test environment, then inspect the request reaching your server.
Troubleshooting: test events work, but production events do not
If webhook test deliveries succeed but real user activity does not trigger events, use this checklist.1) Confirm required OAuth scopes are enabled for each event
| Webhook event | Required scope |
|---|---|
follow.new | read:creator |
purchase.new | read:creator |
subscription.new | read:creator |
tip.new | read:creator |
message.received | read:chat |
message.read | read:chat |
creator.logout | read:self |
2) Confirm the webhook event checkbox is enabled
In your app’s Webhooks tab, verify the event type is selected for the webhook endpoint you configured.3) Re-authorize the app after scope changes
If scopes were added after users already connected your app, previously granted consent may not include those scopes yet.- Open
https://fanvue.com/settings/account/third-party-apps - Revoke access for your app
- Reconnect the app and approve the requested scopes again